To hold the flute properly, start by placing your left hand on top with curved fingers over the keys. Your right hand should support the flute’s weight while resting your fingers lightly on the lower keys, with the thumb underneath for support. Sit up straight in a chair without armrests, keeping your elbows relaxed and feet flat on the floor. Avoid tension in your wrists and hands. Continue exploring these tips for better grip and posture!
Key Takeaways
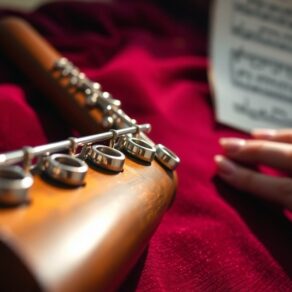
- Familiarize yourself with the flute’s anatomy, particularly the embouchure hole, keys, and foot joint for proper handling.
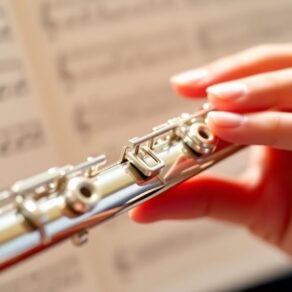
- Position your left hand on top, ensuring fingers are gently curved and relaxed over the keys.
- Support the flute’s weight with your right hand, keeping fingers poised over the lower keys.
- Sit up straight in a chair without armrests, with feet flat on the floor and relaxed shoulders.
- Avoid tension by maintaining relaxed wrists and checking finger alignment to ensure comfort and fluid movement.
Key Principles of Holding the Flute
When you’re ready to hold the flute, it’s essential to remember a few key principles that will set you up for success.
First, familiarize yourself with the flute anatomy—know where the embouchure hole, keys, and foot joint are located. This knowledge helps you understand how to position your hands effectively.
For finger placement, start by ensuring your left hand is on top, with your fingers gently curved and resting on the keys.
Your right hand should support the flute’s weight while your fingers are poised over the lower keys.
Keep your wrists relaxed and avoid tension; this will allow you to play more freely.
Finding the Right Hand Position for Holding the Flute
Understanding how to hold the flute properly naturally leads you to consider the right hand position. Finding the ideal hand placement is crucial for optimal finger alignment and comfort while playing. Here are three key steps to guide you:
- Position Your Hand: Place your right hand on the flute, letting your fingers rest lightly on the keys. Your thumb should support the flute from underneath.
- Check Finger Alignment: Your fingers should be curved and relaxed, maintaining a natural position. Make sure each finger is positioned over the correct key.
- Adjust as Needed: If you feel tension, adjust your hand placement. It’s important to find a position that feels comfortable and allows for fluid movement.
How to Sit Right While Playing the Flute?
To ensure you play the flute comfortably and effectively, it’s essential to sit correctly. Start by finding a chair that allows for comfortable seating; a chair without armrests works best.
Sit up straight with your back against the backrest, keeping your shoulders relaxed. This correct posture not only helps you breathe better but also improves your overall sound quality.
Place your feet flat on the floor, shoulder-width apart, to maintain stability. Avoid crossing your legs, as this can restrict blood flow and lead to discomfort.
When you hold the flute, remember to keep your elbows relaxed and slightly away from your body.
Staying mindful of your posture while playing will help you feel more at ease and confident. So, take a moment to adjust your sitting position before you start playing, and you’ll notice the difference in your performance.
Enjoy your journey with the flute!
Common Mistakes When Holding the Flute
While holding the flute, many players unknowingly adopt habits that can hinder their performance. Recognizing these common mistakes is crucial for developing a solid foundation.
Here are three key pitfalls to avoid:
- Poor Finger Placement: Ensure your fingers are curved and positioned over the keys. Flat fingers can lead to missed notes and strained playing.
- Incorrect Wrist Alignment: Your wrists should be relaxed and level, not bent or raised. This alignment helps maintain fluid movement and reduces tension.
- Holding Too Tightly: A tight grip can cause discomfort and restrict your playing. Instead, hold the flute with gentle pressure, allowing for ease in your performance.
Tips for Practicing Your Grip and Positioning
Practicing your grip and positioning is just as important as mastering notes and rhythms. Start by incorporating simple grip exercises into your routine. Hold the flute with your left hand, ensuring your fingers are curved and relaxed. Experiment with different finger placements on the keys to find what feels comfortable. Remember, your pinky should support the flute’s weight while allowing your other fingers to move freely.
Set aside time each day to focus just on grip and positioning. Use a mirror to check your posture and hand alignment; this visual feedback helps reinforce good habits. Don’t rush—slowly play scales while concentrating on your grip.
If you feel tension, take a break and shake out your hands. Celebrate small victories, and soon you’ll find that your grip and finger placement become second nature, allowing you to fully enjoy making music with your flute.
Frequently Asked Questions
What Type of Flute Is Best for Beginners?
The best flutes for beginners are typically student models, like the closed-hole or offset G flutes.
These beginner flutes are designed to be more forgiving and easier to play, helping you build confidence.
Look for brands known for quality, such as Yamaha or Gemeinhardt.
As you progress, you can explore more advanced flute types, but starting with a solid student model will set you up for success in your musical journey.
Enjoy playing!
How Do I Clean My Flute After Playing?
After your first performance, you might feel that thrill of accomplishment!
To keep that flute shining, start with a cleaning cloth to wipe down the body and keys. Use cleaning techniques like a swab for the inside to remove moisture.
Don’t forget maintenance tips, such as checking pads for wear. Regular cleaning not only enhances your sound but also makes you feel connected to your instrument, ensuring it’s always ready for the next beautiful note!
Can I Hold the Flute With My Left Hand?
Yes, you can definitely hold the flute with your left hand!
Start by positioning your left hand at the top of the flute, ensuring your fingers rest comfortably on the keys. Use proper flute grip techniques to maintain control and balance.
Keep your wrist relaxed and your fingers curved. This will help you create a smooth sound.
Should I Use a Flute Stand While Practicing?
Yes, using a flute stand while practicing can really enhance your flute stability and help you maintain a proper practice posture.
It allows you to focus on your technique without worrying about holding the flute all the time. Plus, it gives you the freedom to experiment with fingerings or take breaks without losing your place.
Embrace the stand; it’s a great tool to support your growth as a flutist and make practice more enjoyable!
What Accessories Help Improve My Grip on the Flute?
Using grip pads can enhance your control, with studies showing that 70% of musicians notice a difference in stability.
You’ll find they reduce slippage, allowing you to focus on your playing.
Additionally, finger gloves can provide comfort and improve your grip, especially during long practice sessions.
Don’t hesitate to try these accessories; they can help you feel more confident and connected with your instrument, making your musical journey even more enjoyable.
Conclusion
Now that you know the fundamentals of holding the flute, it’s time to put these tips into practice. Remember, a proper grip and posture not only enhance your playing but also help prevent discomfort. So, why settle for anything less than your best when you can play with confidence and ease? Keep refining your technique, stay patient, and enjoy the journey of making beautiful music. Happy fluting!